Apple cider vinegar checks all the boxes: it’s probiotic-rich, it’s surprisingly easy to make, you already have the tools you need sitting in your kitchen, and it turns leftover apple scraps into something genuinely useful. Most people assume vinegar-making requires special gear or complicated steps, but the truth is far simpler. With nothing more than a jar, some apple bits, a little sugar, and time, you can create a living vinegar that’s full of beneficial bacteria and flavor. It’s one of those rare projects that’s both practical and satisfying — a zero-waste way to squeeze every drop of goodness out of your apples.
Once you have a batch on hand, it becomes one of the hardest-working ingredients in your pantry. A splash in a pot of beans brightens the flavor. A spoonful in a dressing adds depth and tang. Bakers use it to activate baking soda. Home cooks keep it around for quick marinades, pickles, and sauces. And if you prefer the homespun side of things, ACV also shows up in everything from natural cleaning sprays to hair rinses. It’s incredibly versatile, which makes learning to make it yourself even more worthwhile.
On the health side, raw ACV has a long track record. Its natural acids can support digestion, help with post-meal blood sugar control, and encourage a healthy gut environment thanks to the probiotics in the mother. Some people take a small daily dose for overall wellness, while others use it more situationally — a little diluted in water before a heavier meal, for example. While it’s not a magic cure-all, it’s a simple, traditional food with benefits that a lot of people notice and appreciate.
And here’s the best part: the process is very approachable. No special equipment, no complicated chemistry. Just a slow, natural transformation into bright, tangy, deliciousness.
Apple Cider Vinegar (with the Mother)
Ingredients
- Apple scraps (cores, peels, or chopped whole apples) – organic is best
- 1–2 tablespoons sugar or raw honey (helps kick-start fermentation)
- Filtered, non-chlorinated water (enough to cover apples)
Equipment
- A clean wide-mouth glass jar
- Cheesecloth or a clean towel
- Rubber band or string
Step 1: Prep the Apples
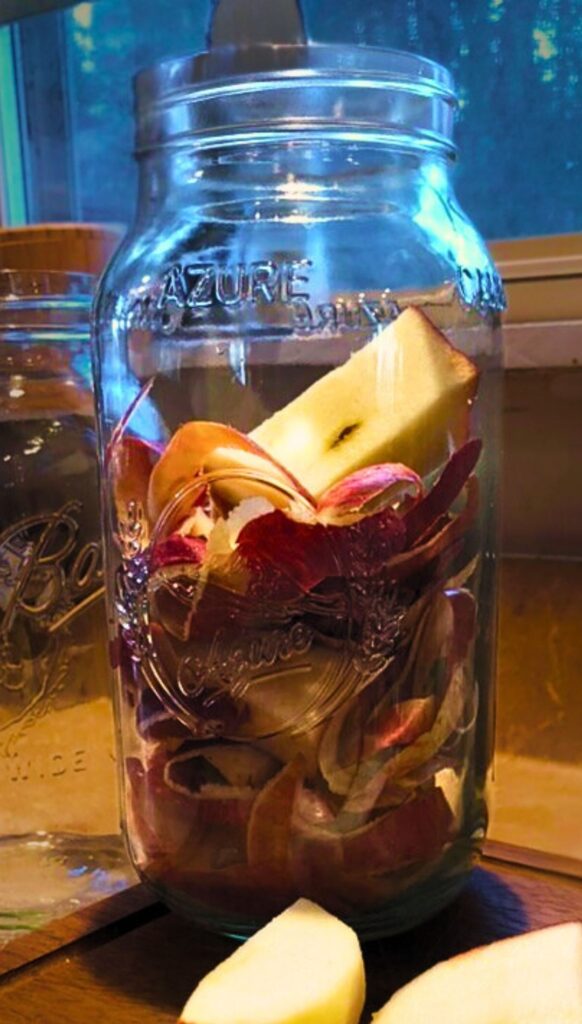
- Place apple scraps (or chunks of apple) into the jar until it’s about ½–¾ full.
- Sprinkle sugar/honey over the apples.
Step 2: Add Water
- Pour in enough filtered, non-chlorinated water to cover the apples completely.
- Leave about 1–2 inches of space at the top of the jar.
Step 3: Cover & Ferment (Alcohol Stage)
- Cover the jar with cheesecloth/towel and secure with a rubber band.
- Place in a dark, room-temperature spot (60–80°F is ideal).
- Stir once a day to prevent mold and ensure oxygen exposure.
- After 1–2 weeks, you’ll smell alcohol—this is apple cider (first stage of fermentation).

Step 4: Strain
- Strain out the solids, then return the liquid to the jar.
Step 5: Vinegar Fermentation (Acetic Acid Stage)
- Cover again with cloth/towel.
- Leave for another 3–4 weeks (sometimes longer).
- You’ll see a cloudy film form—this is the mother, a colony of beneficial acetic acid bacteria.
Step 6: Taste Test
- When the liquid tastes sour (vinegary), it’s ready.
- The longer it sits, the stronger the vinegar becomes.
🏺 How to Store Apple Cider Vinegar
- Strain again if you prefer a clear vinegar, or leave the mother inside for ongoing fermentation.
- Transfer to a clean glass bottle or jar with a tight lid.
- Store in a cool, dark place (like a pantry).
- It will keep indefinitely, and the mother may continue to grow over time.
✅ Tips for Success
- If mold forms on top (fuzzy, green, or black), discard and restart. (Cloudy sediment or brown stringy bits are normal—that’s the mother).
- Always use non-chlorinated water—chlorine can inhibit fermentation.
- Using a little unpasteurized ACV with mother as a starter speeds up the process.
Making your own apple cider vinegar is one of those small kitchen projects that pays big dividends. It transforms scraps you might otherwise toss into a living, probiotic-rich food, adds flavor and versatility to meals, and even offers gentle health benefits. The process is simple, forgiving, and endlessly repeatable — once you’ve made your first batch, you can keep it going indefinitely or share the mother with friends.
Whether you’re using it in a salad dressing, a marinade, or simply enjoying a little diluted in water, homemade ACV is a reminder that some of the best ingredients are also the easiest to make. With just a little patience, a few apple cores, and a jar, you can create something that’s functional, sustainable, and deeply satisfying — and you’ll never look at apple scraps the same way again.

